
Struggling with creating footwork that matches the music? One of the most common types of contrast within a song is between smooth and crisp sounds.
Vocalists will draw out some syllables and punch others; instruments will let some chords ring while others are attacked and then silenced.
Great dancers show these moments of contrast within their bodies.
Footwork is a great place to show the contrast between smooth and crisp sounds because your feet are always moving. By making your footwork show the difference between these sounds, you can be musical no matter what pattern you are dancing.
In this drill, you’ll practice adding contrast to your footwork by changing how your feet make contact with the floor.
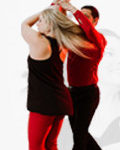
Download and watch our footwork video!
Rolling Through Your Feet – The concept is a prerequisite to this drill.
Footwork for smooth music
One of the easiest ways to show musicality is to adjust the “volume” level of your dancing to the music by modifying your footwork.
Most dancers understand that you can make the dance quieter by taking out weight changes. But, fewer dancers know how to modify their weight changes to make their dancing quieter.
In this drill, we’ll work on dancing triple rhythms with lower volume. This technique is extremely useful when you need to keep your triples (e.g., in the middle of patterns or in competitive situations when you want to show solid technique) but still want to express the quieter elements of the music.
Your drill for smooth music
Find a space where you can dance your triples, and put on a quiet song. Stay With Me by Sam Smith is great during the verses and has a clear beat; if you are comfortable keeping time without a bass section, you can try Jasmine Thompson’s version of Ain’t Nobody.
As you triple to your song, concentrate on two things. First, keep your heels close to the floor. You should still be rolling through your feet, but the foot articulation will be less pronounced than normal. The smaller range of motion makes the triples look quieter. Because you have a smaller range of motion to articulate through, you will need strong ankles in order to keep from stepping on a flat foot or rolling through the foot too quickly. Practice to develop that ankle strength!
Second, let your steps be light. Although you are doing full weight transfers, you don’t need to add any extra force to the step. It is easiest to feel what you are going for by trying to do the opposite. Imagine that you want to create a loud, staccato accent: you would put a lot of energy into the foot as it made contact with the floor. Do the opposite of that: let the foot receive your weight without making an impact with the floor, and transfer your weight with as little force as necessary.
Both of these techniques require good control of your center in relation to your feet, and it’s easy to either fall into the receiving foot or to be sluggish when developing that control. That’s normal: just keep practicing! As you get better at determining how to use the minimum energy necessary to transfer your weight, you’ll find it easier to keep your triples quiet.
Changing up your triples to match the music
For this exercise, practice walking forward at a slow rhythm.
As you walk, pay attention to how your feet connect with the floor. Specifically, focus on the moment after your free foot is extended in front of you, but before your weight transfers onto the foot.
If you have practiced rolling through your feet, this is the point when you would start to articulate through the forward foot.
If you practice a heel lead, you should be releasing the ankle to allow the heel to connect with the floor.
If you use a toe lead, you will be letting the toe and then the ball of the foot make contact.
Either will work for the next part of the drill.
The first version of the drill is to practice letting your foot continue gliding forward at this point.
The bottom of the shoe is touching the floor, but because your weight is not fully over the front foot you can still let the foot glide forward. It can help to make an S sound in your head—”sssssss”—as the shoe brushes across the floor. This glide forward will only be an inch or two, but it is enough to create a little extra smoothness in your footwork.
Once you have practiced the S variation, it’s time to add some crispness to your footwork. Again, start the drill by stepping forward. However, this time, your foot’s forward motion should halt when your shoe pushes into the floor.
Instead of an S sound, think of making a T—a sharp, staccato sound. Your goal is for the foot to “stick” to the floor as soon as you begin to roll through the foot: no further movement is allowed.
After practicing both smooth and crisp variations, try mixing them up.
Start walking and alternate between taking “ssss” steps and “T” steps.
When you feel comfortable switching between the two, dance a song of basics and listen for opportunities to use each type of footwork during the song.
Struggling to connect your dancing to the music?
Download the #1 key to musicality for WCS
Maintain connection while changing your footwork
An important skill in musicality is being able to maintain the connection while changing your footwork.
In this drill, you will practice taking out weight changes in order to show lower-energy moments in the song.
Most dancers are exposed to footwork variations that replace triple rhythms with single rhythms—doing a leg sweep instead of a triple, substituting a drag-step action for an anchor, etc. In this exercise, we’re going to focus on a trickier kind of footwork variation: replacing triple rhythms with double rhythms. Walking through patterns increases the difficulty level because you will start parts of the pattern on different feet; for instance, your anchor will start on the “wrong” foot because you took out one of the weight transfers before the anchor. But, because these variations are trickier, they can be a good way to create contrast within your dance.
The Drill: With or without a partner, dance your basics with walks and no triples. Because you are taking fewer steps, you may need to position your feet differently so that your center can follow the same path as it does on a normal basic.
Focus on where your point of connection is throughout the pattern, and determine how you need to move your body in order to keep the same point of connection as if you were dancing with your normal west coast rhythm. If you have a practice partner, ask them to dance with you while their eyes are closed. Dance both straight walks as well as normal WCS rhythms, and ask them which was which. If they can tell the difference, you should keep practicing so that your body flight and connection remain consistent.
If you struggle with how to move your body or where to place your feet, think about where your center needs to move during each two beat increment. On a push break, for instance, the follower needs to move into compression and then be sent back on 3&4; the leader needs to absorb the follower’s energy and then redirect the follower back towards the end of the slot. To create that effect, how do you need to move your center? If you only have two steps, where do you need to put those steps in order to make that movement happen?
Once you are comfortable with the mechanics of taking out weight transfers, try putting on a song and dancing your normal basics. When the song goes into a low energy part, switch to doing walks for the remainder of that pattern. You should aim to show just a couple of seconds of low-energy: if you keep walking for several patterns in a row, it looks like a mistake instead of an intentional styling choice.


 Brian & Megan