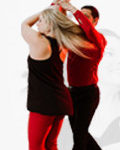
In order to overcome the look of “flat” dancing, beginners are told to add angles to their dance. By rotating their bodies, they show off an extra dimension in the dance—which creates more interesting looks. In this exercise, we’re going to build on that idea.
The most common place to add angles is the anchor because the anchor is a step in which you are not moving, your partner is not moving, and you know what cue to listen for in order to move next (the stretch). That predictability makes the anchor a safe place to create a shape.
However, many dancers lose that shape as soon as the anchor is over. They will create a wonderful rotation during the first beat or so of the anchor, but will then square up on the last beat. Sometimes they will hold the angle just a little longer, but will still square up by 1 in order to be ready for the next pattern.
How much more creativity could you have in the dance if you could actually sustain the angle into the next pattern? A lot. So let’s learn how to hold that angle.
The Drill: This drill can be started on your own, but eventually you will want to practice with a partner in order to make sure that your shaping doesn’t throw off their dance.
During this drill, you will practice establishing a shape on an anchor, holding that angle into the next pattern, and slowly returning to your neutral shape by the 2 of the new pattern.
Start practicing with a push break. By the time you are offering compression (leaders) or absorbing compression (followers), you should be squared up again. However, take your time to get there—really milk the angle through the first two beats.
As you move into and out of your angle, pay attention to where you are rotating. Most dancers will naturally rotate around their body’s axis (the spine), but that will shift the connected arm and affect your partner. Practice instead rotating around the connected shoulder: your connected arm should remain stationary while your body opens and closes (like a door).
When you are comfortable, work on to side passes.
- Leaders, you will quickly learn that some angles work better with patterns that go to one side, and other angles are much smoother if the next pattern goes to your other side. You should practice choosing the angle and next pattern so that you are consistently putting yourself in the correct position.
- Followers, you need to be thinking about the point of connection as you move into patterns. In particular, focus on whether the leader is creating a prep in the connected hand. Your body may be already rotated in that direction, or you may need to rotate the other way. In either case, it is your responsibility to control everything on your side of the connected point and adjust your mechanics in order to prepare for the movement the leader is asking for.
The final element to practice is right-turning patterns. Moves like the whip require the follower to rotate to her right by the end of count 2, and those moves can feel odd with certain angles. Again, each side of the partnership has something to learn:
- Leaders, you may need to adjust the timing for when you lead the rotation. Pay attention to how your follower’s angle influences how the turn needs to be led. If the follower has a really extreme angle, you may even need to abort the whip. That’s okay—practice changing your mind into a normal side pass so you can do it smoothly in the wild.
- Followers, learn how you need to adjust your angle when you feel a right-turning pattern being led. It’s possible to shift smoothly from an angle into the right turn, so keep practicing until it feels natural. You may want to make your angles smaller in order to have better control, and then make the angle more dramatic as you become more comfortable.
[mediacredit inline=”FALSE”]


 Brian & Megan