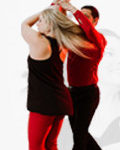
One of the most common types of contrast within a song is between smooth and crisp sounds. Vocalists will draw out some syllables and punch others; instruments will let some chords ring while others are attacked and then silenced. Great dancers show these moments of contrast within their bodies.
In this drill, you’ll practice adding contrast to your footwork by changing how your feet make contact with the floor. Footwork is a great place to show the contrast between smooth and crisp sounds because your feet are always moving. By making your footwork show the difference between these sounds, you can be musical no matter what pattern you are dancing. And, for followers, changing the way you take your steps is really useful when your leader isn’t letting your syncopate your footwork but you still want to show that you hear the music doing something different.
The Drill: For this exercise, practice walking forward at a slow rhythm. As you walk, pay attention to how your feet connect with the floor. Specifically, focus on the moment after your free foot is extended in front of you, but before your weight transfers onto the foot.
If you have practiced rolling through your feet, this is the point when you would start to articulate through the forward foot. If you practice a heel lead, you should be releasing the ankle to allow the heel to connect with the floor. If you use a toe lead, you will be letting the toe and then the ball of the foot make contact. Either will work for the next part of the drill.
The first version of the drill is to practice letting your foot continue gliding forward at this point. The bottom of the shoe is touching the floor, but because your weight is not fully over the front foot you can still let the foot glide forward. It can help to make an S sound in your head—”sssssss”—as the shoe brushes across the floor. This glide forward will only be an inch or two, but it is enough to create a little extra smoothness in your footwork.
Once you have practiced the S variation, it’s time to add some crispness to your footwork. Again, start the drill by stepping forward. However, this time, your foot’s forward motion should halt when your shoe pushes into the floor. Instead of an S sound, think of making a T—a sharp, staccato sound. Your goal is for the foot to “stick” to the floor as soon as you begin to roll through the foot: no further movement is allowed.
After practicing both smooth and crisp variations, try mixing them up. Start walking and alternate between taking “ssss” steps and “T” steps. When you feel comfortable switching between the two, dance a song of basics and listen for opportunities to use each type of footwork during the song.
[mediacredit inline=”FALSE”]


 Brian & Megan